Sparkly Clay Christmas Star Ornament (Easy Holiday DIY)
- twigandtwirl
- Dec 12, 2025
- 3 min read

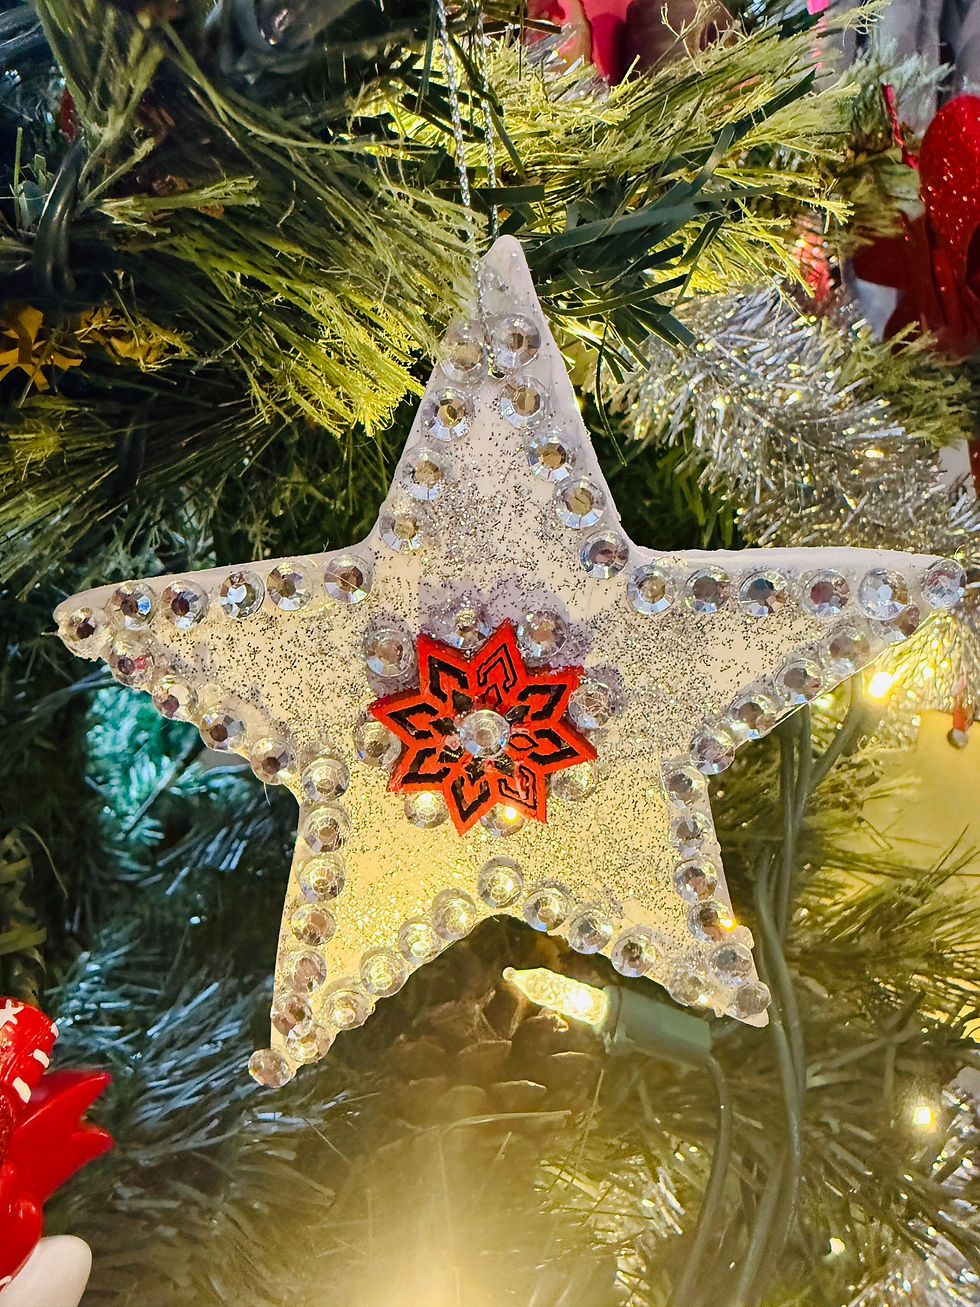
There’s something extra special about handmade Christmas ornaments. They tell a story, hold memories, and—let’s be honest—store a little glittery evidence of cozy crafting sessions. Today I’m sharing how to make this sparkly clay Christmas star ornament, a simple holiday DIY that looks elegant, festive, and beautifully handmade.
This project uses self-drying clay, which means no oven, no stress, and no wondering if you’ve accidentally baked an ornament and your sanity at the same time. It’s perfect for beginners, great for gifting, and easy to customize to match your holiday style.
Why You’ll Love This Ornament
✨ Easy and beginner-friendly
🎄 Perfect for trees, garlands, or gift toppers
🎁 Makes a thoughtful handmade gift
🎨 Fully customizable with color, sparkle, and embellishments
⏱️ Minimal supplies, maximum impact
Supplies You’ll Need
Self-drying clay
Star-shaped cookie cutter or paper template
Rolling pin (or a glass bottle works just fine)
Craft knife (optional)
Straw or skewer (for hanging hole)
Fine glitter or glitter paint
Rhinestones, gems, or decorative accents
Craft glue
Paintbrush
Sealer or Mod Podge
String, ribbon, or twine for hanging
Step-by-Step Tutorial
1. Roll Out the Clay
Start by rolling out your self-drying clay on a smooth surface to an even thickness. Aim for about ¼ inch—thick enough to feel sturdy, but not bulky.
Crafty tip: If the clay feels stubborn, let it rest for a minute. Clay, like people, behaves better when it’s had a moment.
2. Cut Out the Star
Use a star-shaped cookie cutter or a paper template and craft knife to cut out your ornament. Smooth the edges gently with your fingers or a damp sponge for a clean finish.
3. Add the Hanging Hole
Before the clay dries, use a straw or skewer to make a small hole near the top of the star. This is where your ribbon or string will go later—much easier now than trying to drill it afterward.
4. Let It Dry Completely
Allow the ornament to air-dry fully according to your clay’s instructions. Flip it occasionally so both sides dry evenly.
Reminder: This is the stage where it might look… questionable. Trust the process.
5. Paint & Add Sparkle
Once dry, it’s time for the fun part. Paint your star using glitter paint or add a layer of glue and sprinkle fine glitter over the surface. Let it dry completely.
6. Decorate
Glue rhinestones, gems, or a decorative centerpiece onto the ornament. This is where you can really make it your own—go minimal, go bold, or go full sparkle (I fully support that choice).
7. Seal It
Finish with a coat of sealer or Mod Podge to protect your ornament and lock in the glitter. Because nobody wants a sparkly trail from the tree to the couch.
8. Add the Hanger
Thread ribbon, twine, or string through the hole, tie a knot, and your ornament is ready to shine.
Styling & Gifting Ideas
Hang on your Christmas tree or garland
Tie onto wrapped gifts as a keepsake topper
Use as stocking tags with names written on the back
Sell or gift at craft markets and holiday exchanges
Final Thoughts
This sparkly clay Christmas star ornament is one of those projects that proves simple crafts can still feel special. It’s quick, customizable, and full of handmade charm—perfect for slowing down and enjoying the creative side of the holiday season.
If you make this ornament, I’d love to see it! Tag @TwirlCraftStudio on social media or leave a comment below and tell me how you styled yours.
✨ Until next time—take time to twirl and happy crafting! ✨


Comments